I felt it was important to show off our work all together in UDK at the end of this blog. Therefore here are some renders of our scene with lightmass and all my props added in and aligned so the game is playable.
Security Cameras
Above is one of my portfolio shots of the low poly security cameras which i made. I know full well that the textures arent anything detailed but we wanted to make sure they got into the scene and in turn i had to push for what could be acceptable in the timeframe. Having said this the only reason i have used such a low resolution is because from the height you would see these cameras and because of our darkened scene you can only just about see the cameras texture.
Fire Hydrant UDK
We wanted to keep this texture as simple as possible just so the Vidran company logo stuck out more as you ran past it in the game. Therefore I didn’t go for anything over the top and just mixed up some different textures over the top of each other and some colour variation. For such a simple texture I think the final model turns out quite nice.
Air Conditioning Unit UDK
I needed to spend quite a bit more time making sure that the air con units looked old and worn but still not hiding too much of the design. Seeing as the model was so simple i created a normal map to try and bring out some of the vents and grating of the model. I’m quite happy with the outcome of this diffuse map seeing as it actually makes the model look quite good in UDK, especially from the angle that the player would see it from.
Shacks in UDK
We knew straight away that the best way to get our work looking as good as possible was to set up UV sets so we can apply the required textures across whichever appropriate assets. I thought it would help the scene dramatically if we used both mine and Chris’s textures across the shacks so that it looked like it varied and not just the same texture scene over and over. Therefore if we laid out our material sheets the same this could easily be done in UDK. Therefore as you can see in the images below of the scene renders we have both mine and Chris’s textures in varied designs across the majority of shacks.
I wanted to make sure I didn’t do a metal texture that was just the same as the one we already had so I went with a more basic wood style. I couldn’t add too much detail to the wood in case of it standing out in weird lines across the shacks. Therefore I’ve gone for a much simpler basic design and added more detail into the rusted metal and dirty white material.
Fire Escape
We weren’t sure how detailed we needed the fire escape to be for the scene because it was going to be unreachable and quite high. Therefore I thought it was best to make a low poly with planes and just bake a high poly onto this at a later stage. As you can see there it a huge difference in polygon count and detail so it was a good decision to create a low poly version. I came across quite a huge problem when actually trying to line up my fire escapes with more than just the one building. Seeing as the buildings weren’t built with the fire escapes in mind we had areas for window frames and columns that meant I couldn’t use the same fire escape across different buildings, which was originally desired. Seeing as time was becoming an issue we decided as a group it was important make sure everything that was important and built up the lower level of the scene to be textured. So the fire escape had to be left until after the texturing for everything else had been done.
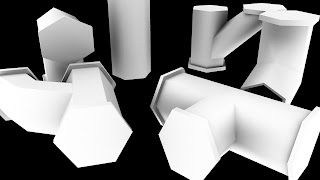
Drainpipes
I created some drainpipe pieces that could be fitted together depending on the design you wanted to make alongside a building. They are all relatively low polygon and therefore could be used alongside multiple buildings.
Subscribe to:
Comments (Atom)


